
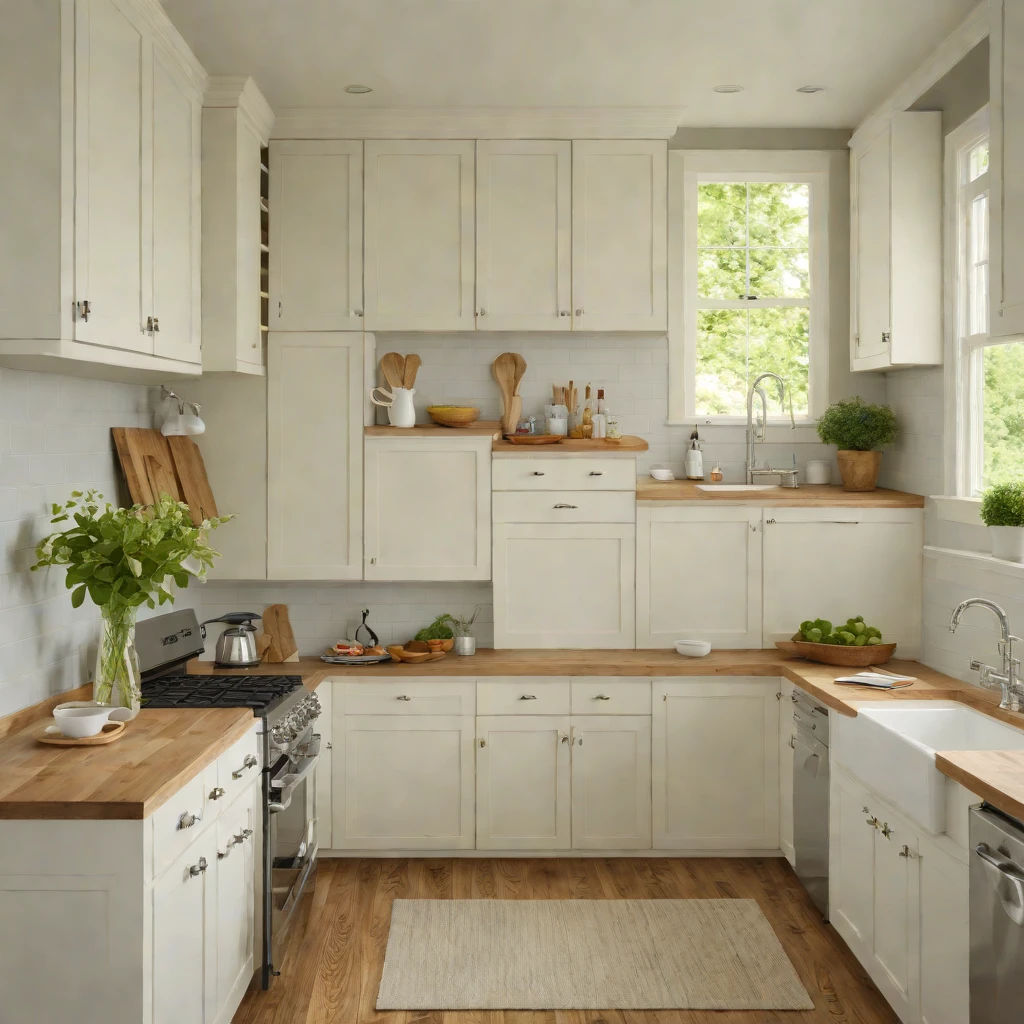
Painting your kitchen cabinets is more than just a home improvement project; it’s a transformative journey that breathes new life into the heart of your home without the expense of a full renovation. As a seasoned expert in home design and renovation, I’ve seen countless kitchens reborn with a fresh coat of paint. It’s an investment of your time and effort, but the reward is a custom, updated space that reflects your personal style and enhances your daily living. This comprehensive, step-by-step guide will walk you through everything you need to know to achieve a durable, professional-looking finish on your kitchen cabinets, empowering you to tackle this project with confidence.
Is Painting Your Kitchen Cabinets the Right Choice?
Before you dive in, let’s assess if painting is the ideal solution for your current cabinets. Painting is an excellent option for cabinets that are:
- Structurally sound: If your cabinet boxes and doors are in good condition, without major warping or irreparable damage, painting is a viable option.
- Good quality material:Solid wood, MDF (medium-density fiberboard), and plywood cabinets are excellent candidates. Laminate or thermofoil cabinets can also be painted, but require specific primers and extra care to ensure adhesion.
- Aesthetically outdated: If the color or finish simply doesn’t match your style anymore, but the layout and functionality still work for you, a paint job is incredibly effective.
If your cabinets are falling apart, have extensive water damage, or are poorly constructed, it might be time to consider replacement rather than a repaint. But for most situations, a fresh coat of paint offers a dramatic and cost-effective kitchen makeover.
The Golden Rule: Preparation is Paramount
Ask any professional painter, and they’ll tell you that the secret to a flawless, long-lasting cabinet finish isn’t just the paint itself, but the meticulous preparation that precedes it. Skipping steps here will inevitably lead to chipping, peeling, and disappointment down the line. Embrace the prep work; it’s where the magic truly happens.
Step 1: Planning Your Vision and Gathering Inspiration
Before any sanding or painting begins, take time to envision your updated kitchen. This initial planning phase is crucial for ensuring you love the end result.
- Color Palette: Research current trends, but also consider timeless appeal. Do you want a bright white, a sophisticated gray, a dramatic navy, or a trending green? Gather samples and observe them in your kitchen’s lighting throughout the day.
- Hardware Selection: New cabinet pulls and knobs can dramatically change the look. Decide if you’ll keep existing hardware, replace it with a similar size, or choose new hardware that might require drilling new holes (it’s easier to patch old holes before painting).
- Timeline & Expectations: Painting kitchen cabinets is not a weekend project. Depending on the size of your kitchen and your chosen paint’s drying/curing times, this project can take anywhere from 3 to 7 days, or even longer if you’re meticulous and working solo. Be realistic with your schedule.
Step 2: Assemble Your Arsenal of Tools and Materials
Having the right supplies on hand before you start will make the process smoother and more efficient. Don’t skimp on quality, especially when it comes to paint and primer.
Cleaning and Disassembly Supplies:
- Screwdriver or power drill: For removing hardware, doors, and drawers.
- Painter’s pyramid stands or sawhorses: To elevate doors for easier painting.
- Labeled bags or containers: To keep hardware and hinges organized for each door.
- Heavy-duty degreaser: Products like TSP (trisodium phosphate) substitute, Krud Kutter, or a strong kitchen cleaner.
- Clean rags or microfiber cloths: Plenty of them!
- Bucket and warm water.
Sanding and Repair Supplies:
- Sanding blocks: For manual sanding in crevices.
- Sander (orbital or hand sander): For larger, flat surfaces.
- Sandpaper: Various grits – 120-150 grit for initial sanding, 180-220 grit for between coats.
- Wood filler or spackle: For repairing dents, scratches, or old hardware holes.
- Putty knife.
- Tack cloths or shop vac with brush attachment: For dust removal.
Protection and Safety:
- Drop cloths or plastic sheeting: To protect floors, countertops, and appliances.
- Painter’s tape: High-quality, low-tack painter’s tape (like FrogTape or 3M ScotchBlue).
- Masking paper or plastic: To protect interior cabinet boxes and walls.
- Respirator mask: Essential for sanding and painting, especially with oil-based products.
- Safety glasses.
- Gloves.
Painting Supplies:
- Primer: This is critical.
- Shellac-based primer (e.g., Zinsser B-I-N): Excellent for blocking stains, odors, and knots. Dries quickly, but cleanup requires denatured alcohol.
- Oil-based primer (e.g., Zinsser Cover Stain): Strong adhesion, good stain blocking, very durable. Dries slower, requires mineral spirits for cleanup.
- Water-based bonding primer (e.g., Kilz Adhesion, Sherwin-Williams Extreme Bond Primer): A good option for less challenging surfaces, easier cleanup, low VOCs.
- Stain-blocking primer: Important if your cabinets are wood and might bleed tannins.
- Paint: Choose a durable, high-quality paint specifically designed for cabinets or trim.
- Alkyd enamel (oil-based): Extremely durable, smooth finish, but longer dry times and higher VOCs.
- Acrylic latex enamel (water-based): Easier cleanup, faster dry times, lower VOCs, but may not be as hard-wearing as alkyd.
- Urethane modified alkyd (hybrid enamel): Many professionals prefer these. They offer the hardness and smooth finish of oil-based paints with the easier cleanup and faster dry times of water-based. Examples include Sherwin-Williams Emerald Urethane Trim Enamel, Benjamin Moore Advance, or Behr Cabinet & Trim Enamel.
- Applicators:
- High-quality brushes: A fine-bristle angled brush (e.g., Purdy Clearcut Elite Glide, Wooster Shortcut) for detailed areas and cutting in.
- Small foam rollers or microfiber rollers:4-inch high-density foam rollers (for ultra-smooth finishes) or microfiber rollers (3/8-inch nap) for slightly textured cabinets.
- Paint sprayer (optional): For the smoothest, most professional finish, a HVLP (High Volume Low Pressure) sprayer is ideal, but it requires practice and a significant setup/cleanup time.
- Paint stirrers.
- Paint pails or trays.
Step 3: The Meticulous Preparation Work
This is the most critical stage. Do not rush any of these steps.
- Empty the Cabinets: Remove all contents from your cabinets and drawers.
- Disassemble:
- Remove all cabinet doors and drawer fronts.
- Carefully remove all hardware (hinges, pulls, knobs).
- Use a labeling system! Number each door and drawer front, and use labeled bags for their corresponding hardware. This makes reassembly much easier.
- Protect Your Kitchen:
- Lay down drop cloths or plastic sheeting to cover floors, countertops, and appliances.
- Use painter’s tape and masking paper or plastic to protect walls, backsplash, and the interior of the cabinet boxes that you don’t intend to paint.
- Thorough Cleaning:
- Kitchen cabinets accumulate grease and grime over the years. This is the single most important cleaning step.
- Mix your chosen degreaser (like TSP substitute or Krud Kutter) according to instructions.
- Wipe down every surface of the doors, drawer fronts, and cabinet frames thoroughly. Pay extra attention to areas around the stove and sink.
- Rinse completely with clean water and fresh rags to remove all residue. Let everything dry completely. Any residual grease or cleaner will prevent paint adhesion.
- Repair and Fill:
- Inspect all surfaces for dents, dings, or scratches. Fill these with wood filler or spackle using a putty knife.
- If you’re changing hardware and the new pulls/knobs don’t align with old holes, fill the existing holes now. Allow filler to dry completely.
- Sanding for Adhesion:
- This step isn’t to remove the existing finish entirely, but to create a “tooth” for the primer to adhere to.
- Using 120-150 grit sandpaper (or a sanding sponge), lightly sand all surfaces you plan to paint. Go with the grain of the wood. For laminate or previously painted surfaces, a light scuff sanding is still crucial.
- Pay attention to any filled areas, sanding them smooth and flush with the surface.
- Thoroughly remove all sanding dust. Use a shop vacuum with a brush attachment, followed by a tack cloth, or a damp rag (let dry completely). Any dust left behind will create bumps in your finish.
Step 4: Priming for Perfection
Primer is your insurance policy against future chipping and poor adhesion. It creates a uniform, stain-blocking base for your paint.
- Choose the Right Primer: Refer back to the primer options in Step 2. For previously stained or varnished cabinets, a shellac-based or oil-based primer offers superior adhesion and stain-blocking properties. For already painted cabinets in good condition, a high-quality bonding primer may suffice.
- Apply Thin, Even Coats:
- Stir the primer thoroughly.
- Apply the primer in thin, even coats. Avoid thick applications, which can lead to drips and slow drying.
- Use your angled brush for detailed areas and a foam roller for flat surfaces.
- Start with the backs of the doors, then the fronts. Paint the cabinet frames last.
- Ensure proper ventilation.
- Dry Time and Light Sanding:
- Allow the primer to dry completely according to the manufacturer’s instructions. This is crucial for proper adhesion of the subsequent coats.
- Once dry, lightly sand all primed surfaces with very fine 220-grit sandpaper or a sanding sponge. This will knock down any raised grain or minor imperfections, creating an ultra-smooth base.
- Wipe away all dust thoroughly with a tack cloth or damp rag (and let dry).
Step 5: The Art of Painting
This is where your vision truly comes to life. Patience and thin coats are your allies here.
- First Coat of Paint:
- Stir your chosen cabinet paint well.
- Apply the first coat using the same technique as the primer – thin, even layers.
- If using a brush, use long, smooth strokes in the direction of the grain. Avoid overworking the paint, which can lead to brush marks.
- If using a foam roller, roll lightly to avoid creating stippling (texture). Overlap slightly.
- If you opt for a paint sprayer, follow the manufacturer’s instructions carefully for dilution and application. This will give the smoothest finish, but has a steeper learning curve.
- Don’t expect full coverage on the first coat. It will likely look somewhat transparent, and that’s perfectly normal.
- Drying and Sanding Between Coats:
- Allow the first coat to dry completely. Refer to your paint can for specific dry times, but typically 4-8 hours for water-based enamels, longer for oil-based.
- Once dry, lightly sand again with 220-grit sandpaper or a very fine sanding sponge. This removes any minor imperfections, dust nibs, and helps create better adhesion for the next coat.
- Clean off all sanding dust with a tack cloth.
- Subsequent Coats:
- Apply a second thin coat of paint. You might see better coverage now.
- Repeat the drying, light sanding, and cleaning process.
- Most cabinets require 2-3 coats of paint for full, even coverage and a durable finish. Darker colors over lighter bases, or vice-versa, might require more.
- Always apply thin coats. Multiple thin coats are far superior to one thick coat, which can sag, drip, and take forever to cure.
Step 6: The Critical Curing Phase and Reassembly
You’re almost there, but this final stage requires the most patience.
- Drying vs. Curing:
- Your cabinets will be “dry to the touch” within a few hours, but “curing” takes much longer. Curing is the process where the paint fully hardens and reaches its maximum durability.
- Depending on the paint type, full cure time can range from 7 days to 30 days or even longer.
- During this curing period, treat your newly painted cabinets with extreme care. Avoid bumping them, placing heavy objects on them, or aggressively cleaning them.
- Reassembly:
- Once the paint is dry to the touch (typically 24-48 hours after the final coat, check paint manufacturer’s recommendation), you can carefully reattach the hardware and reinstall the doors and drawer fronts.
- Refer to your labeling system to ensure everything goes back in its correct place.
- Be gentle when screwing in hardware to avoid scratching your new finish.
- Final Touch-Ups:
- After everything is reassembled, inspect your cabinets for any small spots you might have missed or minor imperfections. Use a small artist’s brush for touch-ups.
- Remove all painter’s tape slowly and carefully to avoid pulling off any paint.
Maintenance for Lasting Beauty
To keep your beautifully painted kitchen cabinets looking fresh for years to come:
- Clean spills immediately with a soft, damp cloth.
- Avoid harsh abrasive cleaners or scrubbers, which can damage the finish. Mild soap and water are usually sufficient.
- Use cabinet bumpers on the inside of doors and drawers to reduce impact.
- Be mindful of steam and heat around the stove and dishwasher; excessive moisture can affect the finish over time.
Common Mistakes to Avoid
- Rushing Preparation: The biggest culprit for paint failure. Don’t skip cleaning, sanding, or priming.
- Skipping Primer: Essential for adhesion, stain blocking, and a uniform base.
- Applying Thick Coats: Leads to drips, uneven drying, and a less durable finish. Always apply multiple thin coats.
- Using the Wrong Paint: Interior wall paint will not hold up to the demands of a kitchen. Invest in high-quality cabinet or trim enamel.
- Ignoring Drying and Curing Times: Patience is your best tool. Opening cabinets or placing items too soon will cause damage.
- Poor Ventilation: Essential for your health and for proper drying of the paint.
Painting your kitchen cabinets is a rewarding project that can dramatically transform your home. While it demands time, attention to detail, and a bit of elbow grease, the satisfaction of stepping into a revitalized kitchen is immeasurable. By following these expert steps, you’re not just painting cabinets; you’re crafting a fresh, beautiful, and durable foundation for countless memories in your home’s most beloved space. Get ready to enjoy your stunning, custom kitchen!



No Comments