
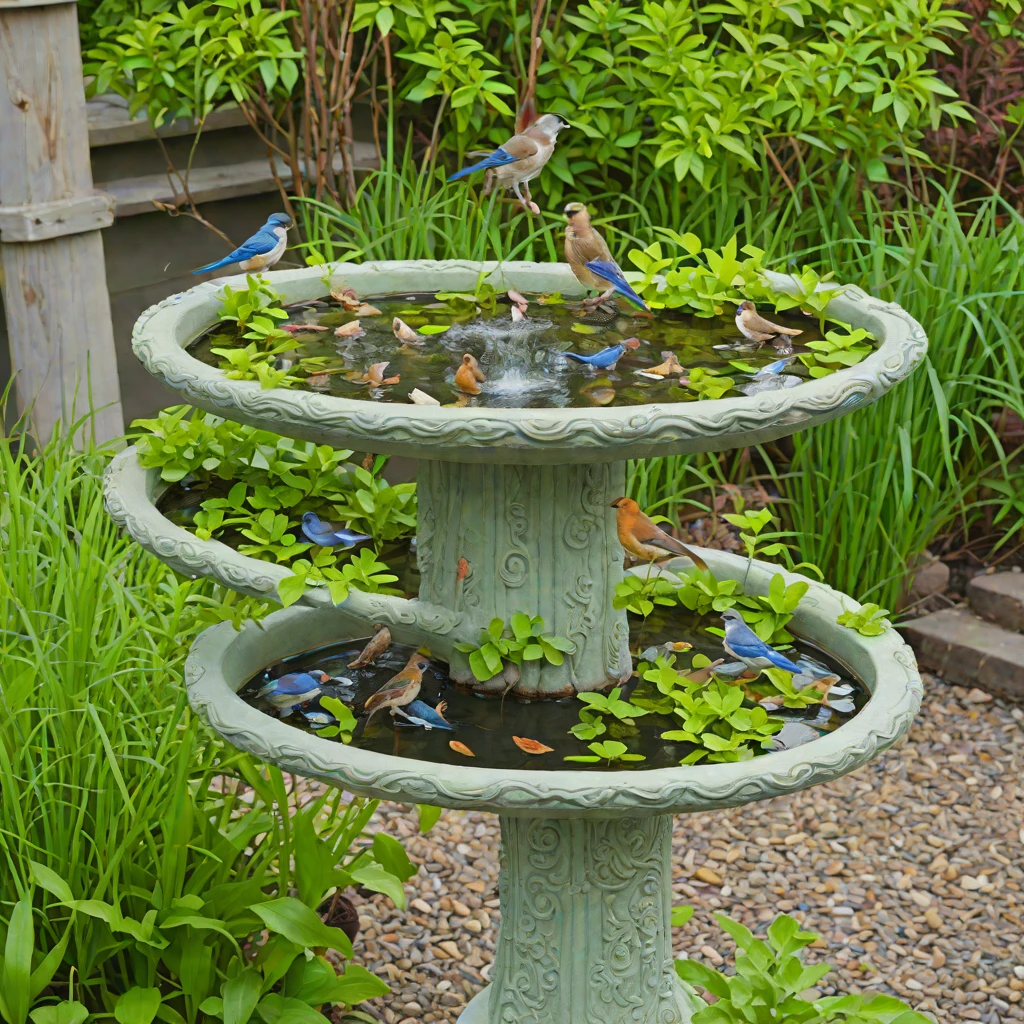
There’s a special kind of magic that unfolds when you invite nature into your backyard. Few things bring more immediate joy and a sense of tranquility than watching birds flit, splash, and preen in a fresh water source. A well-placed bird bath isn’t just a charming garden accent; it’s a vital amenity for local wildlife, offering refreshment and a safe place to bathe, especially during dry spells or harsh winters.
As an expert in outdoor spaces and garden design, I’ve seen firsthand how a simple addition like a homemade bird bath can transform a garden into a vibrant ecosystem. You don’t need to spend a fortune on store-bought options when the most unique and charming designs can be crafted right in your own workspace. Building your own bird bath is a rewarding DIY project that allows you to infuse your personal style into your landscape, all while providing an essential service to your feathered friends. Let’s dive into 13 creative and achievable homemade bird bath ideas that will make your garden a true bird sanctuary.
Why a Homemade Bird Bath is a Garden Essential
Beyond the undeniable aesthetic appeal, a bird bath offers significant benefits for both your garden and its inhabitants. Attracting birds to your garden provides natural pest control, as many species feed on insects. It also contributes to local biodiversity, creating a mini-ecosystem right outside your door. For the birds, a reliable water source is crucial for hydration and feather maintenance, especially for smaller songbirds who need to keep their plumage in top condition for insulation and flight. Your homemade creation will serve as a welcome oasis, a place where they can drink, clean their feathers, and cool off.
Key Considerations Before You Build Your DIY Bird Bath
Before you gather your materials, a little planning goes a long way. Thinking through these points will ensure your homemade bird bath is not only beautiful but also safe, functional, and easy to maintain.
- Placement is Paramount: Choose a spot that offers a clear view for you, but more importantly, a safe escape route for the birds. Avoid placing it too close to dense shrubs where predators like cats might hide. A location near a tree or shrub provides a quick perch for birds to survey their surroundings before bathing. Partial shade will keep the water cooler and reduce evaporation.
- Water Depth: Birds prefer shallow water. The ideal depth for a bird bath bowl is typically no more than 1 to 2 inches at the center, gently sloping upwards. You can always add flat stones or gravel to create varying depths and provide perches.
- Stability and Security: Your bird bath needs to be sturdy enough to withstand wind, curious animals, and the weight of bathing birds. Consider the base and how it will be anchored.
- Material Safety: Ensure any materials you use are non-toxic and won’t leach harmful chemicals into the water. Food-grade sealants are a must for anything that will hold water. Avoid slippery surfaces for the birds’ safety.
- Ease of Cleaning: Bird baths require regular cleaning to prevent algae and bacterial growth. Design yours with accessibility in mind, making it easy to scrub and refill.
13 Homemade Bird Bath Ideas for Your Garden
1. The Classic Terracotta Saucer Bird Bath
This is arguably the most common and beloved DIY bird bath, and for good reason: it’s simple, affordable, and timeless. Terracotta blends beautifully with any garden aesthetic.
- Materials: Two to three different sized terracotta pots, one large terracotta saucer (12-16 inches diameter), strong outdoor adhesive or epoxy.
- How To: Stack the terracotta pots upside down, from largest to smallest, using the adhesive to secure each layer. Ensure the stack is stable. Once dry, attach the large terracotta saucer to the top, ensuring it’s level.
- Expert Tip: For extra stability, fill the bottom pot with sand or gravel before sealing. Use silicone sealant to plug the drainage hole in the saucer to hold water effectively.
2. Upcycled Bowl and Pedestal Bird Bath
Transform an old, sturdy bowl and a found item into a stylish statement piece.
- Materials: A durable, shallow bowl (ceramic, glass, or metal), a sturdy pedestal (could be an old garden urn, a decorative concrete block, or a thick wooden post), outdoor adhesive.
- How To: Clean your chosen bowl thoroughly. Securely attach the bowl to the top of your pedestal using a strong outdoor adhesive. Make sure the bowl is level.
- Expert Tip: Look for bowls with a slightly textured surface to give birds better grip. If using a wooden post, ensure it’s treated for outdoor use to prevent rot.
3. Leaf-Cast Concrete Bird Bath
Create a stunning, naturalistic bird bath using a large leaf as a mold. This project is incredibly rewarding and results in a unique, organic piece.
- Materials: Large, sturdy leaf (like rhubarb, hosta, or burdock), rapid-setting concrete mix, sand, trowel, plastic sheeting, cooking spray or petroleum jelly, rubber gloves.
- How To: Spread a layer of sand on the plastic sheeting to create a slight mound. Lay the leaf vein-side up on the mound, coating it lightly with cooking spray. Mix concrete according to package directions. Spread a 1-2 inch thick layer of concrete over the leaf, molding it slightly to follow the leaf’s natural curve. Let it cure for at least 24-48 hours. Carefully peel away the leaf.
- Expert Tip: Once cured, seal the concrete bird bath with a non-toxic, food-grade concrete sealant to prevent water absorption and prolong its life. This also helps keep the water clean.
4. Mosaic Tile Bird Bath
Add a splash of color and artistry to your garden with a mosaic design. This is perfect for personalizing a basic bird bath or upcycling an old one.
- Materials: An existing bird bath bowl or a shallow, sturdy concrete/terracotta saucer, mosaic tiles (broken ceramic dishes, glass pieces, pebbles), outdoor tile adhesive, grout, sponge, bucket.
- How To: Clean the surface of your bowl. Arrange and adhere your mosaic pieces to the inside of the bowl using tile adhesive, leaving small gaps for grout. Allow to dry. Apply grout over the tiles, pressing it into the gaps. Wipe away excess grout with a damp sponge.
- Expert Tip: Wear gloves and eye protection when breaking tiles. Ensure your grout is outdoor-rated and sealed to resist water and weathering. Add a few smooth stones to the bottom for bird perches.
5. Stacked Stone Bird Bath
Embrace a rustic, natural look by stacking flat stones to create a sturdy, beautiful bird bath.
- Materials: Various sizes of flat, sturdy stones, a shallow, flat stone for the top bowl, outdoor construction adhesive or mortar.
- How To: Start with a wide, flat base stone. Stack progressively smaller stones, using adhesive or mortar between layers, to build a stable column. Finish with a shallow, flat stone on top to serve as the water basin. Ensure the top stone is relatively level.
- Expert Tip: Choose stones with interesting textures and colors. This bird bath blends seamlessly into rock gardens or natural landscapes. Check for stability frequently during construction.
6. Repurposed Tire Bird Bath
Give an old tire a new lease on life as a quirky, robust bird bath. This is a great way to recycle and add an industrial-chic touch.
- Materials: One old tire, paint (outdoor, non-toxic), heavy-duty plastic liner or a shallow plastic bowl, gravel or sand (for stability), optional: decorative rocks.
- How To: Clean the tire thoroughly. Paint it with an outdoor-grade, non-toxic paint in a color that complements your garden. Once dry, place the plastic liner or shallow bowl inside the tire. You can fill the tire with sand or gravel around the bowl for added stability.
- Expert Tip: Ensure the plastic liner or bowl is shallow enough for birds. You can even embed decorative rocks into the tire for extra flair before the paint dries.
7. Hanging Teacup Bird Bath
For a whimsical, charming touch, create a hanging bird bath from an old teacup and saucer. This works wonderfully in smaller gardens or patios.
- Materials: Sturdy teacup and saucer set, strong waterproof adhesive, chain or heavy-gauge wire, drill with a masonry bit (if drilling ceramic), or large decorative hook.
- How To: Securely glue the teacup to the saucer using waterproof adhesive, creating a shallow basin. If using a chain, you may need to drill small holes in the saucer’s rim (very carefully!) or wrap the wire securely around the saucer. Alternatively, use a large, decorative hook that can cradle the saucer. Hang from a sturdy branch or hook.
- Expert Tip: This is best suited for small birds due to its size. Use an epoxy-based adhesive for maximum strength and water resistance.
8. Glass Plate/Bowl Stacker Bird Bath
Create a shimmering, artistic bird bath by stacking various glass plates and bowls. The sunlight will catch the glass, adding sparkle to your garden.
- Materials: Various sized glass plates and bowls (thrift store finds are perfect), outdoor-rated, clear epoxy adhesive, a sturdy base (metal rod, rebar, or a thick wooden dowel).
- How To: Select a large, shallow glass bowl for the top. Carefully glue smaller plates and bowls together, creating a pedestal-like structure. Ensure each piece is clean before gluing. Once dry and stable, attach the entire stack to your chosen base, making sure it’s securely anchored in the ground.
- Expert Tip: Choose thick, tempered glass for durability. Consider adding a few smooth pebbles to the top bowl for bird footing.
9. Salvaged Wood and Bowl Bird Bath
Combine the warmth of natural wood with a practical basin for a rustic, inviting bird bath.
- Materials: A sturdy piece of salvaged wood (tree stump, thick branch, old fence post), a shallow metal or ceramic bowl, wood screws or strong outdoor wood adhesive, wood sealant.
- How To: Prepare your wood piece – sand any rough edges, and treat it with an outdoor wood sealant to protect against moisture and rot. Securely attach the shallow bowl to the top of the wood using screws or adhesive. Ensure the bowl is level and stable.
- Expert Tip: Choose a bowl that contrasts nicely with the wood for visual interest. This design is perfect for a woodland garden or a more naturalistic setting.
10. Old Lamp Base Conversion
An antique floor lamp base, stripped of its electrical components, can become a stunning and elegant bird bath pedestal.
- Materials: Old floor lamp base (metal or cast iron are ideal), a shallow, sturdy bowl, outdoor metal adhesive or epoxy, primer and outdoor paint (optional).
- How To: Dismantle the lamp, removing all electrical wiring. Clean and prepare the lamp base, optionally priming and painting it with an outdoor-rated paint. Securely attach your chosen bird bath bowl to the top of the lamp base using strong adhesive.
- Expert Tip: Heavy cast iron bases offer excellent stability. Ensure any original finishes on the lamp base are outdoor-safe or apply a protective clear coat.
11. Concrete Planter Bird Bath
Utilize the strength and versatility of concrete planters to create a multi-tiered or simple bird bath structure.
- Materials: One large, shallow concrete planter or bowl (for the basin), smaller concrete planters or blocks (for the pedestal), outdoor construction adhesive.
- How To: Stack the smaller concrete planters or blocks to form a stable pedestal, using construction adhesive between layers. Place the large, shallow concrete planter on top, securing it with adhesive. Ensure the top planter is level and watertight.
- Expert Tip: Concrete can be very heavy, so ensure your base is solid. You can paint the concrete with a weather-resistant, non-toxic paint to match your garden’s color scheme.
12. Upside-Down Pot Bird Bath
This simple yet effective design uses common garden items for a quick and easy bird bath solution.
- Materials: One large, sturdy terracotta or ceramic pot, one large, shallow terracotta or ceramic saucer, strong outdoor adhesive.
- How To: Turn the large pot upside down to form the base. Apply a generous amount of outdoor adhesive to the rim of the upturned pot. Center the large saucer on top of the adhesive, ensuring it is level. Allow it to cure completely.
- Expert Tip: For extra charm, consider painting the pot and saucer with an outdoor-rated, non-toxic paint before assembling. Plug the saucer’s drainage hole with silicone sealant to hold water.
13. Galvanized Tub Bird Bath
For a farmhouse or rustic industrial aesthetic, a galvanized tub makes a fantastic, durable bird bath.
- Materials: Small galvanized tub or bucket, sturdy base (e.g., old milk can, wooden crate, stack of bricks), optional: large rocks or branches for perches.
- How To: Place your chosen base in your desired garden spot, ensuring it’s stable. Position the galvanized tub securely on top of the base. Fill the tub with water.
- Expert Tip: Galvanized metal can get very hot in direct sun; place this bird bath in a partially shaded area. Add a few large, smooth stones to the bottom of the tub to create varying depths and provide safe perches for birds.
Maintaining Your Homemade Bird Bath
Your beautiful new homemade bird bath isn’t just a decoration; it’s a functional piece of wildlife habitat that requires regular care. Consistent maintenance ensures the water remains clean and safe for birds, and prolongs the life of your DIY creation.
- Daily Checks: Top off the water level daily, especially during hot weather. Birds will quickly empty a shallow basin.
- Regular Cleaning: Clean your bird bath every 2-3 days, or more often if it looks dirty. Dump out the old water, scrub the basin with a stiff brush to remove algae and debris, and rinse thoroughly. Avoid harsh chemicals or soaps; a solution of 9 parts water to 1 part white vinegar can be used for deeper cleaning, followed by a thorough rinse.
- Winter Care: In freezing temperatures, bring delicate bird baths indoors. For permanent structures, consider a safe, low-voltage bird bath heater to keep water unfrozen. Never use salts or anti-freeze, as these are toxic to birds.
- Algae Control: Ensure your bird bath is in partial shade to reduce algae growth. Regular cleaning is the best defense.
Making Your Bird Bath Truly Bird-Friendly
Beyond the build itself, a few extra touches can make your homemade bird bath even more inviting and safer for your feathered visitors.
- Provide Perches: Birds appreciate a place to land and survey before entering the water. Placing a few smooth, flat stones or a sturdy branch in the basin itself will provide crucial perches and varying depths.
- Shallow Water is Key: Remember, 1-2 inches of water is ideal. If your chosen bowl is deeper, use stones or gravel to raise the floor.
- Moving Water: Birds are attracted to the sound and sparkle of moving water. While a DIY moving water feature might be a more advanced project, even a simple solar-powered bubbler or dripper can make a significant difference in attracting more birds.
- Predator Awareness: Keep your bird bath at least 10-15 feet away from dense foliage where predators might lurk. A clear sightline for birds to spot danger is vital.
Creating a homemade bird bath is more than just a garden project; it’s an act of welcoming, a way to connect with the natural world right outside your door. Each of these 13 ideas offers a unique pathway to crafting a beautiful, functional addition to your outdoor space, providing a vital resource for your local bird population. Whether you choose the rustic charm of stacked stones, the artistic flair of mosaics, or the classic appeal of terracotta, you’re building a little oasis that will bring joy to both you and your feathered friends for years to come. So roll up your sleeves, gather your materials, and let your creativity take flight!

No Comments