
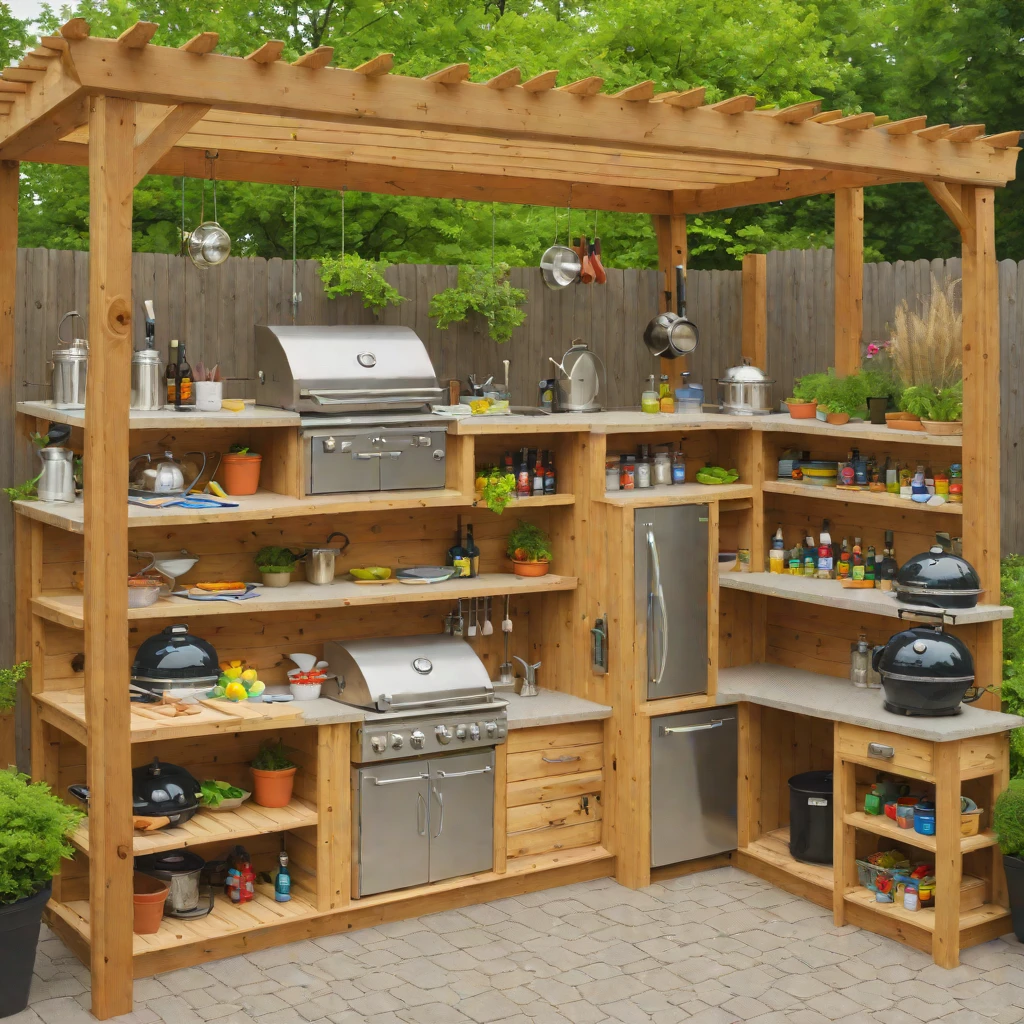
Dreaming of sizzling burgers under the open sky, crafting cocktails on your patio, or hosting unforgettable backyard dinner parties? An outdoor kitchen elevates your home entertaining and everyday living to a whole new level. But let’s be honest: the price tag on many custom outdoor kitchen setups can feel like a splash of cold water on that dream.
Here’s the good news from your seasoned DIY and home design expert: building a functional, stylish, and incredibly inviting outdoor cooking space doesn’t have to drain your savings. With some savvy planning, smart material choices, and a willingness to roll up your sleeves, you can create the ultimate backyard culinary zone on a budget. We’re talking about genuine, achievable DIY outdoor kitchen ideas that deliver big on impact without breaking the bank. Let’s dive into 13 brilliant ways to build your dream outdoor kitchen without the dream price tag.
Why Go DIY for Your Outdoor Kitchen?
Beyond the undeniable financial benefits, opting for a DIY outdoor kitchen build offers a unique sense of accomplishment and allows for unparalleled customization. You get to hand-pick every element, ensuring it perfectly suits your lifestyle, aesthetic preferences, and entertaining needs. It’s an opportunity to truly personalize your outdoor living space, making it a reflection of you and your family.
Essential Considerations Before You Begin Your Budget Outdoor Kitchen Project
Before you start hauling materials, a little strategic planning goes a long way. Consider these crucial points for your affordable outdoor kitchen:
- Location, Location, Location: Where will your outdoor kitchen best serve you? Think about proximity to your indoor kitchen, utility hookups (water, gas, electricity), shade, wind protection, and flow with your existing patio or deck.
- Zoning and Permits: Always check with your local municipality. Some structures, especially those with permanent gas lines or electrical work, may require permits.
- Weatherproofing: Your outdoor kitchen needs to withstand the elements. Choose materials designed for outdoor use and consider covers or sealants to protect your investment.
- Utility Needs: Will you need a plumbed sink? A dedicated gas line for your grill? Electrical outlets for small appliances or lighting? Plan these early, as adding them later can be costly.
- Your “Must-Haves”: Prioritize. Is a grill the most important? A prep area? Storage? A mini-fridge? Focus your budget on these core components first.
13 Outdoor Kitchen DIY Ideas on a Budget
1. The Cinder Block & Countertop Grill Station
One of the most robust and cost-effective ways to create a base for your grill is with cinder blocks (also known as concrete blocks). These humble blocks are incredibly sturdy, easy to stack, and can be dry-stacked or mortared for a more permanent structure.
- How to DIY: Create a simple U-shape or straight wall structure around your existing grill. Use construction adhesive for added stability if not mortaring. Top with a durable, inexpensive countertop material like a sealed plywood slab, large pavers, or a granite remnant for your prep area.
- Budget Tip: Look for salvaged cinder blocks or buy in bulk. Paint the blocks a solid color for a modern, finished look, or stucco them for texture.
2. Repurposed Pallet Wood Outdoor Bar & Prep Area
Wood pallets are a DIYer’s dream, offering free or low-cost raw material with a rustic charm. They’re perfect for building a simple outdoor bar or a designated prep counter.
- How to DIY: Disassemble pallets carefully to get usable planks, or stack whole pallets to form a base. Sand them thoroughly to prevent splinters and treat the wood with an outdoor sealant or paint to protect against moisture. Add a basic countertop from exterior-grade plywood or a piece of butcher block sealed for outdoor use.
- Budget Tip: Source pallets for free from local businesses (ask first!). Ensure they are heat-treated (HT stamp) and not chemically treated (MB stamp).
3. The Mobile Kitchen Cart from a Repurposed Dresser or Cabinet
Need flexibility? A mobile kitchen is a game-changer. Find an old dresser, chest of drawers, or sturdy kitchen cabinet at a thrift store or garage sale.
- How to DIY: Clean, sand, and paint the piece with exterior-grade paint. Add heavy-duty caster wheels to the bottom for easy movement. Replace the top with a more durable surface like a stainless steel sheet, a cutting board, or an outdoor-rated tile top for a compact DIY outdoor cooking station.
- Budget Tip: Upcycling existing furniture keeps costs incredibly low. The drawers offer built-in storage for utensils and condiments.
4. Galvanized Tub Sink Station
A plumbed sink can be a budget-buster, but a simple galvanized tub sink provides a charming, functional alternative for rinsing hands or fresh produce.
- How to DIY: Build a sturdy base (from wood or cinder blocks) to support the tub at a comfortable working height. Position it near a garden hose for easy filling and consider a simple drain valve at the bottom to direct greywater away, perhaps into a planter. You can even rig a small hand pump for convenience.
- Budget Tip: Galvanized tubs are relatively inexpensive and add a rustic farmhouse touch to your backyard kitchen DIY.
5. DIY Concrete Countertops (Form-in-Place or Pre-Cast)
Concrete countertops offer a sleek, modern, and incredibly durable surface at a fraction of the cost of natural stone. You can either pour them in place over your cabinet bases or cast them in forms beforehand.
- How to DIY: Build sturdy frames (forms) from melamine for a smooth finish. Mix and pour special countertop concrete mix, vibrate out air bubbles, and trowel smooth. After curing, remove forms and seal thoroughly to protect against stains and weather.
- Budget Tip: The main costs are cement mix, sand, and form materials. This technique is more labor-intensive but yields a high-end look for an affordable outdoor kitchen countertop.
6. Built-in Grill Surround with Treated Lumber
For a clean, integrated look around your standalone grill, a surround built from pressure-treated lumber is a fantastic option.
- How to DIY: Construct a simple box frame to fit snugly around your grill, leaving appropriate clearances for ventilation. Cover the frame with exterior-grade plywood, then finish with siding, cement board and stucco, or even more treated lumber planks. Add a simple countertop on either side for prep space.
- Budget Tip: Standard lumber sizes are economical. Use exterior screws and fasteners for longevity.
7. Plywood & Stucco Finish Kitchen Island
Stucco provides a smooth, durable, and weather-resistant finish that gives an upscale Mediterranean or modern vibe.
- How to DIY: Build your island’s skeleton using pressure-treated lumber for the base and exterior-grade plywood for the surfaces. Securely attach cement board over the plywood. Apply a stucco base coat, then a finish coat, following manufacturer instructions. Top with your chosen countertop.
- Budget Tip: Plywood is a cost-effective structural material, and stucco mixes are relatively inexpensive compared to stone or tile finishes, offering a high-impact look for your cost-effective outdoor kitchen design.
8. Stacked Stone Veneer Look (Over Cement Board)
Achieve the luxurious look of natural stone without the hefty price tag and complex masonry. Manufactured stone veneer comes in lightweight panels or individual pieces that are much easier to install.
- How to DIY: After building a sturdy base (like the plywood/cement board frame from Idea #7), apply the stone veneer directly to the cement board using thin-set mortar. Start from the bottom and work your way up, staggering joints for a natural appearance. Seal after installation.
- Budget Tip: Shop for clearance or end-of-lot stone veneer at home improvement stores. This is an excellent way to elevate the aesthetic of your budget outdoor kitchen island.
9. Modular Kitchen with Pre-Made Utility or IKEA Cabinet Boxes
Don’t reinvent the wheel! Many companies, including IKEA, offer utility cabinets or basic kitchen cabinet frames that can be adapted for outdoor use with some modifications.
- How to DIY: Purchase basic indoor cabinet boxes (often particle board or MDF). Assemble them and then thoroughly seal all surfaces with an exterior-grade paint or sealant. Add waterproof countertops and consider replacing internal shelves with more durable outdoor material if desired. Place them under a covered patio for extra protection.
- Budget Tip: Look for sales on unfinished base cabinets or scour IKEA’s “As-Is” section. The key is thorough sealing and placement in a protected area to prolong their life as a DIY outdoor kitchen cabinet.
10. Reclaimed Brick Pizza Oven Base
A wood-fired pizza oven is a dream for many. While the oven itself can be an investment, you can save substantially by building the base yourself using reclaimed bricks.
- How to DIY: Create a solid foundation (concrete slab or strong footings). Build a sturdy, level base with reclaimed bricks, using mortar. Ensure the base is strong enough to support the significant weight of a pizza oven. This project requires basic masonry skills but yields an incredibly authentic and charming result.
- Budget Tip: Hunt for free or low-cost reclaimed bricks from demolition sites (with permission!) or landscaping companies.
11. Outdoor Kitchen on Wheels (from a Workbench or Utility Cart)
For ultimate flexibility and compact spaces, transform a sturdy workbench or a large utility cart into a mini outdoor kitchen.
- How to DIY: Choose a workbench with a durable top or replace it with a weather-resistant one like stainless steel or composite decking. Add hooks for tools, a magnetic strip for knives, and perhaps a small cutting board that slides out. If it doesn’t have wheels, add heavy-duty locking casters.
- Budget Tip: Often, you can find used workbenches or carts for very little, providing a perfect foundation for a portable and small outdoor kitchen solution.
12. Vertical Herb Garden & Storage Wall
Maximize vertical space and add both beauty and functionality. A vertical wall can incorporate storage, a fresh herb garden, and even a small folding prep surface.
- How to DIY: Mount a sturdy frame (from treated lumber or galvanized pipe) against an exterior wall or fence. Attach exterior-grade shelving, hooks, and planters. Consider a small fold-down table attached to the frame for extra temporary prep space.
- Budget Tip: Use repurposed wood, old fence panels, or even salvaged pallet wood for the frame. Simple terracotta pots or even recycled plastic bottles can become planters, making this a truly budget-friendly outdoor kitchen accessory.
13. Corrugated Metal & Wood Frame Kitchen
For an industrial-chic look that’s surprisingly economical, combine a simple wood frame with corrugated metal sheets.
- How to DIY: Build a simple rectangular frame from treated lumber to your desired dimensions. Fasten corrugated metal sheets to the outside of the frame using self-tapping screws with rubber washers. The metal can be used for sides, back, and even a simple overhang. Add a durable countertop on top.
- Budget Tip: Corrugated metal is relatively inexpensive, readily available, and incredibly durable for outdoor use. It requires minimal finishing and instantly gives a unique edge to your DIY backyard cooking space.
Bonus Tips for Maximum Budget Savings
- Scavenge & Salvage: Keep an eye out for free materials on Craigslist, local Facebook groups, or construction sites (always ask first!). Old pavers, bricks, wood, or even discarded granite remnants can be treasures.
- Utilize What You Have: Incorporate your existing grill, patio furniture, or even a sturdy old wagon into your design.
- Phased Approach: You don’t have to build everything at once. Start with a functional grill station and add a sink, storage, or bar seating later as your budget allows.
- DIY the Max: The more you do yourself, the more you save on labor costs. Don’t be afraid to learn a new skill!
- Shop Smart: Look for sales on appliances, tiles, and outdoor-rated materials. Consider open-box items or floor models.
Safety First!
When working with tools, heavy materials, and especially plumbing or electrical components, prioritize safety. Wear appropriate personal protective equipment (PPE) like gloves, safety glasses, and hearing protection. If you’re uncomfortable with gas lines or complex electrical work, it’s always wise to consult or hire a qualified professional for those specific installations. Your DIY outdoor kitchen project should be fun and safe!
Your Dream Outdoor Kitchen Awaits!
Creating an incredible outdoor kitchen doesn’t require a bottomless budget. With these 13 creative and cost-effective DIY ideas, you have a roadmap to build a personalized, functional, and beautiful cooking and entertaining area right in your own backyard. From a simple grill station to a comprehensive mobile unit, the possibilities are endless when you embrace smart design and the power of DIY. So, grab your tools, get inspired, and get ready to enjoy countless delicious meals and memories al fresco!



No Comments