
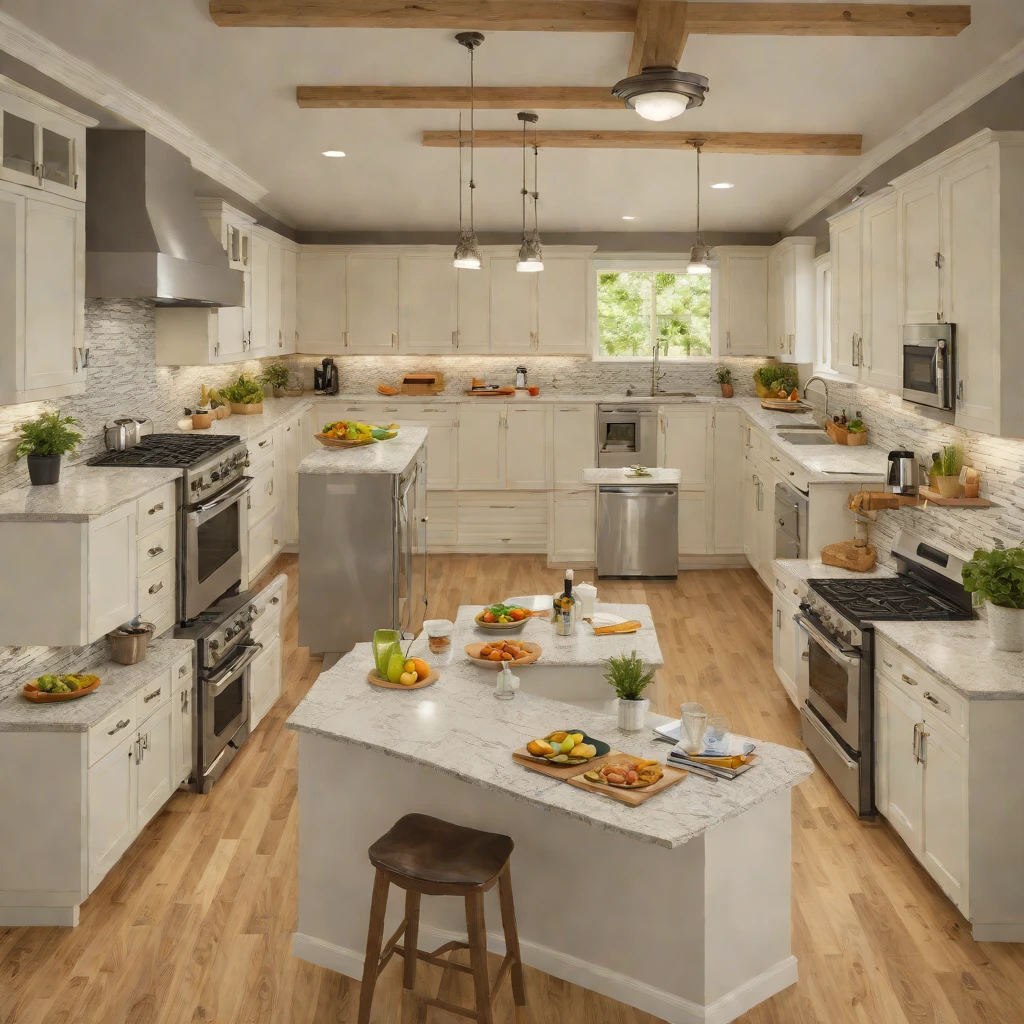
Embarking on a kitchen remodel is one of the most exciting, and often most daunting, home improvement projects you can undertake. It’s an investment in your home’s value, your lifestyle, and your daily joy. Whether you’re dreaming of a sleek, modern cooking space, a cozy farmhouse hub for family gatherings, or a highly functional chef’s paradise, a successful outcome hinges on meticulous planning.
As a renovation expert, I’ve seen firsthand how a well-structured plan can transform potential headaches into triumphs. This comprehensive step-by-step guide is designed to empower you with the knowledge and confidence to navigate your kitchen remodeling journey, from the first spark of inspiration to the final gleaming countertop. Let’s dig in and create the kitchen you’ve always envisioned.
Phase 1: Dreaming & Defining Your Vision (The Foundation)
Before you lift a hammer or even choose a paint swatch, the most critical step is to thoroughly define your vision. This isn’t just about aesthetics; it’s about understanding how you live, cook, and entertain.
1. Envision Your Ideal Kitchen & Lifestyle Needs
- Reflect on your current kitchen: What works? What doesn’t? What frustrates you daily? Is it lack of counter space, poor storage, inefficient layout, or outdated aesthetics?
- Consider your lifestyle: Do you entertain frequently? Are you a passionate home chef, or do you prefer quick meals? Do you have young children or pets? Will your kitchen serve as a homework station or home office? This informs the kitchen layout, material durability, and storage solutions.
- Gather inspiration: Dive into magazines, Pinterest, and design blogs (like Architectural Digest or The Spruce). Create an inspiration board of colors, styles, materials, and features you love. Think about overall aesthetic: modern kitchen design, traditional, transitional, minimalist, industrial, or farmhouse.
- Prioritize functionality over trends: While trends are fun, ensure your core choices align with long-term usability.
2. Establish a Realistic Budget
This is where dreams meet reality. A clear, honest budget is the bedrock of your entire kitchen remodel project. Many homeowners underestimate the true cost of a kitchen remodel.
- Research average costs: Get a sense of what similar projects in your area cost.
- Allocate funds: A general breakdown for kitchen remodels often looks like this:
- Cabinetry & Hardware: 30-40%
- Labor & Installation: 15-20%
- Countertops: 10-15%
- Appliances: 8-15%
- Flooring: 5-10%
- Plumbing & Electrical: 5-10%
- Lighting: 5%
- Backsplash & Other Finishes: 2-3%
- Include a contingency fund: Always set aside 10-20% of your budget for unforeseen issues, such as discovering old plumbing problems or unexpected structural repairs during demolition. This prevents stress and keeps your project on track.
- Financing options: Explore home equity loans, lines of credit, or personal loans if needed.
3. Explore Kitchen Layout Options
The layout dictates the flow and efficiency of your kitchen. Consider the classic “work triangle” (sink, stove, refrigerator) and modern zoning principles. This stage is crucial for optimizing your kitchen design.
- The Work Triangle: A classic design principle aiming for efficiency.
- U-Shaped Kitchen: Offers maximum counter and storage space.
- L-Shaped Kitchen: Versatile, often paired with an island.
- Galley Kitchen: Efficient for smaller spaces, with two parallel countertops.
- One-Wall Kitchen: Ideal for very small spaces or open-concept living.
- Modern Zones: Think about specific areas for prepping, cooking, cleaning, and storage.
- Considering an island or peninsula: These add valuable prep space, seating, and storage. An open concept kitchen often benefits from a well-placed island.
- Traffic flow: Ensure clear pathways, especially around major appliances and entrances.
4. Research Materials and Finishes
This is where your kitchen’s personality takes shape. Dive into the world of materials, keeping your budget, desired aesthetic, and durability needs in mind. Choosing the right materials is key to a long-lasting and beautiful kitchen renovation.
- Cabinetry: The largest visual element and functional component.
- Types: Stock, semi-custom, or custom cabinets.
- Styles: Shaker, flat-panel (slab), raised-panel, ornate.
- Materials: Solid wood, plywood, MDF (medium-density fiberboard).
- Finishes: Paint, stain, laminates, thermofoil.
- Consider storage solutions like pull-out shelves, lazy Susans, and pantry cabinets.
- Countertops: High-impact decision for both aesthetics and function.
- Popular choices:Quartz (engineered stone, durable, low maintenance), granite (natural stone, unique patterns, requires sealing), marble (luxurious, prone to etching), butcher block (warm, can be sanded), laminate (budget-friendly, wide variety), concrete (industrial, customizable).
- Flooring: Needs to be durable, easy to clean, and comfortable underfoot.
- Options: Hardwood, engineered wood, tile (porcelain, ceramic), luxury vinyl plank (LVP), linoleum.
- Consider slip resistance and water resistance.
- Backsplash: A chance to add personality and protect walls.
- Materials: Ceramic tile, porcelain tile, subway tile, natural stone, glass tile, mosaic.
- Consider patterns, grout color, and full-height options.
- Appliances: Integrate these early into your plans.
- Brands and features: Research specific models of refrigerators, ranges, ovens, dishwashers, and microwaves.
- Finishes:Stainless steel appliances, black stainless, panel-ready, white.
- Think about smart appliance features for efficiency.
Phase 2: Assembling Your Team & Finalizing Design (Expert Guidance)
With your vision and budget established, it’s time to bring in the professionals who will turn your ideas into reality. This is a critical phase for your kitchen remodeling plans.
5. Hire the Right Professionals
A good team makes all the difference.
- General Contractor: Essential for managing the entire project, coordinating trades, and ensuring quality. Look for experience in kitchen remodels, good communication skills, and positive references.
- Kitchen Designer: If your project is complex or you need help with space planning, material selection, and aesthetic cohesion, a dedicated designer can be invaluable. They can also provide detailed drawings and elevations.
- Architect/Structural Engineer: Necessary if you plan to move walls, open up the space, or make significant structural changes.
- Specialty Trades: Plumbers, electricians, cabinet installers, flooring installers. Your general contractor will usually manage these, but sometimes you might hire directly for specific components.
6. Finalize Your Design & Plans
Work closely with your designer and/or contractor to finalize every detail.
- Detailed drawings: Review floor plans, elevations (side views), and 3D renderings to visualize the space.
- Material specifications: Confirm every material, finish, appliance model, fixture, and hardware selection. Create a spreadsheet to track everything.
- Electrical & plumbing plans: Where will outlets, switches, light fixtures, and plumbing lines be located? This is critical for future functionality.
- Storage solutions: Confirm specific cabinet inserts, pantry layout, and organizational features.
7. Understand Permits & Regulations
Do not skip this step! Most kitchen remodels involving plumbing, electrical, or structural changes require permits from your local municipality.
- Check local requirements: Your contractor should be familiar with this, but it’s good for you to be aware.
- Permit application: This ensures your project meets safety and building codes. Failing to obtain necessary permits can lead to fines, difficulties selling your home, and insurance complications.
- Inspections: Be prepared for various inspections throughout the construction process (e.g., rough plumbing, electrical, final).
Phase 3: Procurement & Preparation (Getting Ready)
The waiting game begins, but this time is crucial for efficient execution of your kitchen remodeling plans.
8. Order Materials & Appliances
Many items have significant lead times, so order early to avoid delays.
- Cabinets: Can take 4-12 weeks or more, especially for custom options.
- Countertops: Fabrication can begin once cabinets are installed, but slabs need to be selected and ordered.
- Appliances: Popular models can have backorders; order well in advance.
- Flooring, tile, fixtures: Confirm availability and delivery dates.
- Secure Storage: Plan where to store materials once they arrive to prevent damage.
9. Prepare Your Home for Construction
Minimize disruption and protect your belongings.
- Create a temporary kitchen: Set up a makeshift cooking and cleaning station in another part of your home (e.g., laundry room, basement, garage). A microwave, toaster oven, and mini-fridge can be lifesavers.
- Clear out the kitchen: Empty all cabinets, drawers, and countertops. Pack essentials you’ll need during the renovation.
- Protect adjacent areas: Cover doorways with plastic sheeting to contain dust. Lay down floor protection (ram board or heavy-duty tarps) in high-traffic areas leading to the kitchen.
- Move furniture: Clear the path for workers and protect furniture in adjacent rooms.
Phase 4: The Construction Phase (Transformation Begins)
This is where the magic happens, but it’s also the messiest and most disruptive phase. Patience and good communication with your contractor are key.
10. Demolition
Out with the old! This is often the quickest but dustiest part of the process.
- Removal of old cabinets, countertops, appliances, flooring, and potentially walls.
- Ensure proper waste disposal.
11. Rough-Ins: Plumbing, Electrical, HVAC
The hidden infrastructure of your new kitchen.
- Plumbing: New water lines for sinks, dishwashers, refrigerators; drain lines.
- Electrical: New wiring for outlets, switches, light fixtures, appliance dedicated circuits.
- HVAC: Relocation of vents, addition of exhaust fan ducting.
- All these elements are installed before walls are closed up.
12. Inspections
Once rough-ins are complete, your local building inspector will examine the work before it’s covered.
- Ensure all work meets code requirements.
- Do not proceed until these inspections pass.
13. Wall Patching & Drywall
Once rough-ins pass inspection, walls are repaired or new drywall is installed and taped for a smooth finish.
14. Cabinet Installation
The structure of your kitchen begins to take shape.
- Cabinets are meticulously leveled, secured to wall studs, and aligned.
- This step must be precise, as it sets the stage for countertops and appliances.
15. Flooring Installation
The chosen flooring is installed after cabinets, unless it’s a floating floor or specific circumstances dictate otherwise.
- Allow for proper curing or acclimation time as required by the material.
16. Countertop Measurement & Installation
Once cabinets are in, precise measurements are taken for your custom countertops.
- Fabrication can take a week or two.
- Installation is often a single day, but it’s a dramatic transformation!
17. Backsplash & Wall Finishes
With countertops in place, the backsplash is installed, followed by painting or other wall treatments.
18. Appliance Installation
Your chosen appliances are moved in and hooked up.
- Confirm all connections (electrical, water, gas) are properly made.
19. Plumbing Fixtures & Lighting
Sinks, faucets, garbage disposals, and all light fixtures (pendants, under-cabinet lighting, recessed lights) are installed.
Phase 5: Finishing Touches & Enjoyment (The Payoff)
The final steps that bring your vision to life and ensure everything is perfect.
20. Hardware & Accessories
Cabinet pulls, knobs, and other decorative hardware are installed. These are the jewelry of your kitchen.
- Consider towel bars, pot fillers, and other thoughtful accessories.
21. Final Paint & Clean-Up
Any necessary touch-up painting is done. A thorough professional cleaning should follow, removing all construction dust and debris.
22. Final Walkthrough & Punch List
Walk through your new kitchen with your contractor, noting any small imperfections or items that need adjustment. This is called a “punch list.”
- Ensure every item on the punch list is addressed to your satisfaction before making final payments.
23. Enjoy Your New Kitchen!
The hard work is over. Stock your cabinets, arrange your decor, and start cooking in your beautiful, functional new space. It’s time to host that housewarming party or simply savor your morning coffee in your dream kitchen.
A kitchen remodel is a significant undertaking, but with careful planning, clear communication, and a fantastic team, it’s an incredibly rewarding experience. By following these steps, you’re not just renovating a room; you’re creating the heart of your home, designed specifically for your life. Enjoy every moment in your spectacular new kitchen!





No Comments