You sit down with a mug of coffee, ready to tackle email, and the first thing you notice is clutter. Cables curl behind the monitor, last year’s tax files live in a leaning tower, and the makeshift shelf you bought on sale is starting to sag. A chaotic workroom does more than look messy. It drains energy, slows focus, and makes every task feel twice as heavy. The good news is you don’t need a contractor or a giant budget to flip the script. A handful of thoughtful changes can turn that catch-all room into a calm, built-in style office that works as hard as you do.
Below you’ll find seven tried-and-true tricks I lean on when clients ask for an instant lift. Each one is practical, reasonably priced, and completely doable in a weekend or less. If the idea of full-blown Home Office Built Ins has felt out of reach, consider these strategies your shortcut.
Quick Glance: The 7 Tricks
- Paint Every Surface One Color for a Seamless Built-In Feel
- Swap Basic Hardware for “Jewelry”
- Create Layered Lighting That Flatters and Functions
- Hide Cables with Simple, Inexpensive Tricks
- Add Texture to the Back of Shelves
- Install a Slide-Away or Fold-Down Work Surface
- Style Shelves with Intention, Not Filler
Let’s walk through each step with real-life context so you can adapt the ideas to your own space.
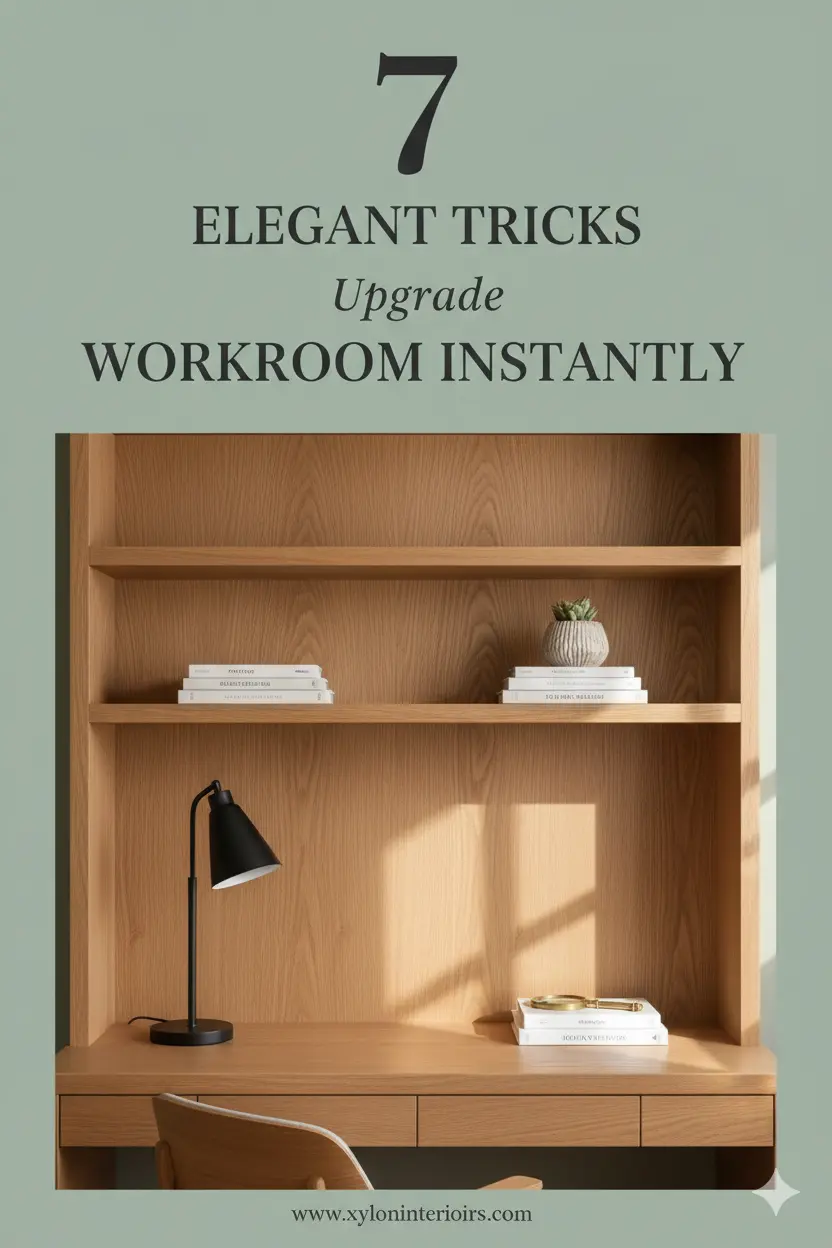
1. Paint Every Surface One Color for a Seamless Built-In Feel
Paint is the fastest route to a custom look. When all the storage pieces in a room share one color, the eye reads them as a single architectural element rather than separate furniture. That trick alone makes flat-pack shelving resemble true Home Office Built Ins.
How to do it
- Choose a shade already present in your trim, flooring, or favorite décor item. Deep greens, muted olives, and soft charcoal are trending yet timeless.
- Use a high-quality primer, especially on laminate surfaces. A bonding primer stops peeling and gives the topcoat a smooth finish.
- Carry the color onto the wall behind the unit and even the baseboards if you can. This is what creates that seamless line.
Designer tip: Satin or semi-gloss paints reflect just enough light to highlight the architecture without reading shiny.
“I never thought painting the whole unit would make such a difference,” says Lauren, a homeowner who completed the job in one day. “Now it feels like my desk grew out of the wall instead of being shoved against it.”
2. Swap Basic Hardware for “Jewelry”
Think of knobs and pulls the way you think of bracelets and earrings. They are small, affordable, and wildly effective at changing a mood. Standard silver bar pulls can feel cold. A matte brass knob or a leather tab, on the other hand, warms the room and signals intention.
Choosing hardware
- Measure existing hole spacing so you can reuse the same screws if you’re renting or don’t want to patch.
- Mix metals carefully. If your light fixture is black, a subtle brass or antique pewter often plays well.
- Order one sample first. Photos lie. Hold it against your unit in daylight before committing.
A fifteen-minute hardware swap can give old cabinets the elegance of high-end millwork, which is exactly what people pay for in bespoke Home Office Built Ins.
3. Create Layered Lighting That Flatters and Functions
Overhead lighting casts harsh shadows and makes a room look flat. Layered lighting—meaning several light sources at different heights—adds depth, reduces eye strain, and keeps video calls flattering.
Every home office needs three layers
- Task. A directional desk lamp or under-shelf LED strip aimed at your keyboard.
- Ambient. A ceiling fixture or flush-mount that spreads light evenly.
- Accent. Plug-in wall sconces or small puck lights inside shelves to highlight décor.
Most accent lights come with self-adhesive backing and can be installed without drilling. They draw minimal power—great for renters or anyone not ready to call an electrician.
4. Hide Cables with Simple, Inexpensive Tricks
Cables are the number one giveaway that a space is doing double duty. Built-ins rarely show wires, so tucking them out of sight finishes the illusion.
My go-to methods
- Raceways. Plastic channels that stick to the wall and can be painted the same color.
- Desk grommets. Two-inch holes trimmed in rubber. They cost a couple dollars and route charging cords right where you need them.
- Velcro wraps. Skip disposable zip ties. Velcro is adjustable, reusable, and kinder to cables.
- Hook-and-loop strips under the desk. Run a power bar along the underside so only a single cord meets the outlet.
Set a timer for one hour, gather every stray cable, and watch the entire room calm down.
5. Add Texture to the Back of Shelves
Even the smartest Home Office Built Ins can feel flat if the shelf backs are bare. A touch of texture adds depth and turns storage into a feature wall.
Budget-friendly options
- Peel-and-stick wallpaper. Patterns like vertical grass cloth or subtle geometric prints look custom and remove easily.
- Beadboard panels. Lightweight, paintable, and nearly foolproof with a brad nailer or strong construction adhesive.
- Leftover paint in a contrasting shade. If the shelves are white, try a smoky blue or clay behind them.
One afternoon, a quart of paint, and suddenly the shelves read like an intentional design moment rather than a necessity.
6. Install a Slide-Away or Fold-Down Work Surface
Not every workroom has square footage for a permanent additional desk. A slide-away surface tucks inside cabinetry and pulls out only when needed. A fold-down table does the same on a wall.
Installation snapshot
- Measure the cabinet interior and purchase full-extension drawer slides that match.
- Attach a plywood panel trimmed to size, sand, and paint it the same color as the unit.
- For wall-mounted fold-downs, anchor into studs and add a simple piano hinge on the bottom edge.
Instant extra workspace for spreading documents or inviting a second laptop, no remodel required.
7. Style Shelves with Intention, Not Filler
Once the bones look custom, finishing touches matter. Styling is the step most homeowners rush, but it makes or breaks the final effect.
Follow the 60-30-10 equation
- 60 % useful items like reference books, storage boxes, or printers inside closed cabinets.
- 30 % personal objects—photos, travel finds, plants.
- 10 % breathing room. Negative space lets the eye rest.
Group items in odd numbers and vary heights. Place heavier pieces toward the bottom for visual stability. If something feels off, remove an item instead of adding more.
A friend once told me, “When I cut the shelf clutter in half, I started using the space twice as much.” Smart words.
Putting It All Together
Look back at the list. None of these tricks require a full gut renovation. Most require little more than an afternoon, a paintbrush, or a cordless drill. Yet combined, they deliver the cohesive, intentional look people pay thousands for when ordering custom Home Office Built Ins.
Take it at your own pace. Maybe you start with new hardware this weekend, paint next month, and add lighting when the budget allows. Every step is progress, and each layer will compound the sense of calm and productivity you feel in the room.
For more down-to-earth design ideas, I often browse Xylon Interior, a warm spot to explore layouts, finishes, and budget-savvy solutions that translate to real life.
Final Thoughts
Your workroom should support the way you live, not compete with it. Elegant spaces aren’t about price tags; they’re about thoughtful choices layered over time. Listen to what your room is telling you, start with one small change, and watch the momentum build. You deserve a workspace that invites focus, creativity, and maybe even a moment of peace with that morning coffee.
Happy updating, and remember—every paint stroke, hardware twist, or tucked-away cable is a step toward a room that works for you.


No Comments